Wednesday, February 28, 2018

Surviving Disneyland with Kids

Tips for Disneyland with kids

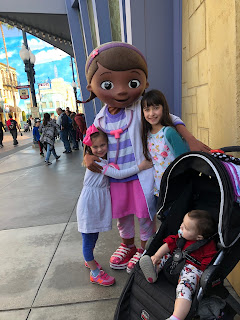
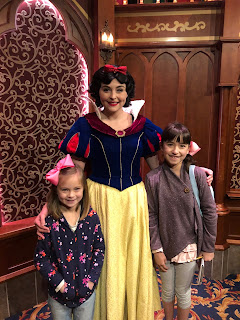
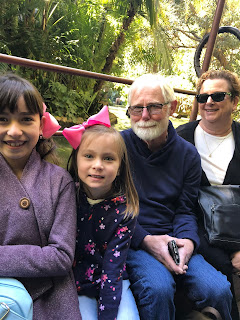
Last week my family took a trip to Disneyland.  It was so much fun!  But, it was also so much work!  Since my trip is still so fresh in my mind, I thought I'd share a few things with you that were helpful.  If you have any tips, please feel free to leave a comment below!

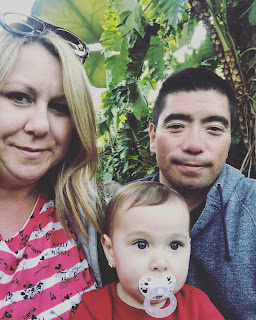
We have three kids, ages 9, 6, and 13 months.  We were lucky enough to travel with my parents which meant there were 4 adults to our 3 kids.  We live in Sacramento and we drove, so it was about an 8 hour car trip. I could write a post alone on entertaining kids on car trips, but this post is about Disney so I'm going to skip over the travel, but did want you to know we aren't near Disney and only go every year or two, so by no means are we experts, these are just a few things I found to be really helpful!
  • Pack snacks and drinks! Yes! You can bring your own food and drinks into Disneyland.  And, if you have kids, you really should!  Of course there are tons of restaurants at Disney and lots of treats! And by all means, eat and try what you want, but kids can be picky!  So, bring fruit snacks, goldfish crackers, juice boxes... whatever your kids love, and water!  Water is spendy there, but there are lots of water fountains, so if you bring your own water bottle, refilling is easy.  You will do lots and lots of walking and we found that someone was almost always hungry or thirsty, so bringing your own snacks and drinks can save you quite a bit of money, not to mention the stress of not finding the "right" snack.
  • Strollers and your options... As we were arriving on the first day I saw some parents in line in front of us with their kids in a wagon.  You know, the kind that can fold up small and fit easily in the car, but when you expand it, a few toddlers and their things can fit inside?  Well, I felt so bad for them, because as we were going through security, they were told that they couldn't bring it into the park.  Only strollers that you can push, not pull are allowed. So, I strongly suggest you do your research and make sure that what you are planning to bring into the park is allowed.  In fact, CLICK HERE for the link to the resort's list of permitted items! If you do have small kids, my youngest is 13 months, I would highly recommend bringing a stroller.  Weather you choose to bring a small umbrella one or your fancy BOB, is up to you, but your back and their tiny legs will thank you.  Another quick tip, do something to make your stroller distinguishable in a crowd.  Seriously, I have never seen so many strollers parked in one place in my life!  This made finding ours, a plain black Britax stroller, a little tricky. We had a brightly colored blanket that I laid over the canopy which made it easy to spot, but a ribbon on the handle or something to make it stand out will make it much easier to find.  Also, Disney employees frequently move strollers, so don't be surprised if you come back to it and it's not exactly where you left it.  
  • Baby wearing.  In addition to a stroller, I also recommend if you are bringing a baby or child under two that you bring some type of carrier.  I brought my Ergo and my ring sling, but the ring sling wasn't as comfortable as the Ergo.  Strollers cannot be brought into lines or inside many of the shows or experiences, so you will be holding baby a lot even if you do bring a stroller.  Even with three other adults, my Ergo Baby got a ton of use and I'm so glad I brought it!
  • Split meals! Yes, more about food!  I found that when I ordered kids meals for my older kids, they could not come close to finishing their food.  Ordering one kids meal for them to share, was a much more affordable option and they also were able to finish more of their food.  If someone was still hungry after their meal (that never happened) I would get them an ice cream or a treat.
  • Pay the extra for the fast pass and don't be afraid to ask about the baby swap!  My mom paid the extra money for the fast pass on our tickets.  She had the app on her phone and could choose the ride we wanted a fast pass for.  Example, she choose Space Mountain and we were give a ride time of 9:30-10:30am. We had an hour window to ride the ride. When we got to the ride, we got in the fast pass line.  If we were all riding, my mom got her phone out and scanned us all and we rode the ride.  After the ride, we could choose another ride to get a fast pass for.  Only one pass at a time, but it saved lots of time not having to wait in line.  If, however we needed to do a baby swap on a fast pass it would work like this: everyone gets in fast pass line, tell the attendant you want to do a baby swap, he takes your ticket and scans it and it gives you and hour to make your swap.  Grandma and kids ride the ride.  When they are done, give them baby and mom and dad can then ride the ride.  Totally worth the money and the time spent waiting in lines is drastically reduced!
  • Baby Care Center.  If you are doing Disney with a baby, learn where the Baby Care Center is!  My daughter is 13 months old, but she is still on formula because of a medical issue.  Formula and cold water don't mix very well together and she will not drink a bottle that is cold.  The baby care center has microwaves, high chairs, changing tables, comfortable chairs for nursing, warm water and a sink with dish soap to wash bottles or pacifiers.  They also have formula, diapers, wipes, sunscreen, diaper rash cream and a few other supplies that you may have run out of or simply forgot to pack, for sale.  I only visited the center a few times for warm water, but if you have a baby, you will want to know this exists!  It is also indoors and has heat/ac so if the weather is extreme, it is a nice place for you and baby to have a little quiet time in a temperature controlled environment.
  • Backpack vs. diaper bag. This is my last tip and one of personal preference.  Normally when we are out and about at home, I carry a diaper bag and just tuck my wallet into it when we run errands.  But, I didn't want to leave a diaper bag hanging on my stroller when we went on rides, and carrying the baby and a bag was just too much.  I actually bought myself a backpack on the first day we were there and that evening switched everything from the diaper bag to the backpack for the remainder of the trip.  The back pack was so much easier to carry, even when I was wearing the baby in my Ergo.  I never had to leave it behind on the stroller, it easily fit my wallet, phone, diapers, wipes and snacks and there was even room for some souvenirs I didn't want to leave on the stroller for fear of them being stollen.  As I said, this was just personal preference, but it made things a lot easier for us.
Trip to DisneylandSurviving Disney


California AdventureTaking baby to Disnelyand


Disney tripbaby's first disneyland trip


Disneyland Fast Pass

If you are planning a trip with your kids soon, I hope that these tips help you out!  I'd love to hear what tips you have as well!  

Have fun at the happiest place on earth!!


Sunday, February 18, 2018

New Dining Table


Right after Christmas I decided I wanted to redo some things in our home.  With a newly walking baby and all the stuff that comes with, I just felt like our home needed more space.  Since there's so quick fix for that I decided that simplifying and rearranging things would have to happen.  Our main living space is completely open, dining and living.  I used to have a hutch against one wall and a credenza (buffet) against the window.  I was also feeling the need to have a little less painted furniture.  I feel like my style is revolving and I was no longer in love with my dining table and bench.  So, impulsively, I listed it on a Facebook website and it sold right away. 

I was really interested in a rustic farmhouse table, but I couldn't find any in stores that were the right dimensions for my room, they were all too long.  I was searching an online garage sale site for furniture when I stumbled upon someone who makes custom pieces at VERY reasonable prices.  I was sold!  I contacted her and within two weeks I had a new table and bench.  I like a bench on one side of the table, as it's easy for the kids and I can fit 3-4 easily on it, but I like chairs on the other side, and of course, my existing chairs just didn't match.  Luckily, I found some at World Market that were affordable and work great! 

Next, I moved the credenza to the wall my hutch was formerly on and placed the top part of the hutch (both were chalk painted in the same color) on the credenza.  It looks like it was always meant to be this way. Now we have storage in the bottom part of the hutch and it actually looks so much better on this wall, as it's taller now and makes more of a statement.  We love how it all turned out.  I moved the clock I had in the living room to this wall because it was the perfect color and size for the space.


What do you think about how it all turned out?  Do you ever get the impulse to sell a bunch of stuff and redecorate?  There's something so freeing about letting stuff go and simplifying.  If you live in the Sacramento area and want a custom table message me and I'd be happy to pass on the carpenter's info! 

Thursday, February 15, 2018

Mediterranean Sheet-Pan Dinner

mediterranean food, artichokes, olives


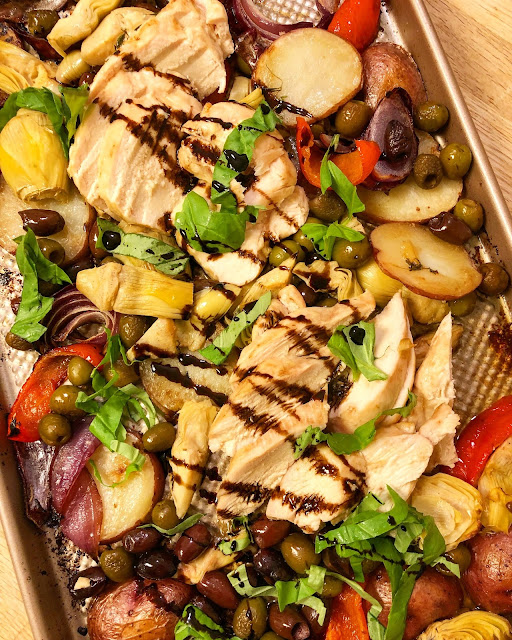
All over Pinterest and Facebook I keep seeing these yummy ideas for sheet-pan dinners.  A few weeks ago when we were at the pediatrician's office she was talking about how she made one the other day and it turned out good.  So, on Monday I decided to give it a try.  It was delicious, but I learned some things, so I'm going to share my experiences with you today, and my recipe!

First tip, don't use super thick chicken breasts.  I bet the little tenders would be perfect, or just normal sized portions.  I had giant breasts I got from Sprout's the other day and they took a while to cook, so this was not a quick 30 minute meal for my family.

Second tip, make sure to pat dry your ingredients if the are marinading, for example, artichoke hearts, olives, ect.  They really need to be dry so things don't turn out soggy.


Ingredients:
4 regular sized chicken breast portions or 8-10 breast tenders
1 can of artichoke hearts drained and patted as dry as you can get them
1 can of pitted green olives
1 small can of black or kalamata olives pitted
1 red bell pepper seeded and cut into large strips
2 red potatoes sliced 1/2" thick
1/2 a red onion cut into thick slices
olive oil
fresh thyme
salt & pepper
granulated garlic
balsamic glaze (bought at Trader Joe's) (you don't need this but it makes it pretty and give it extra flavor)
fresh basil for garnish

Directions:
Spray a large sheet pan with non-stick spray and pre-heat your oven to 425 degrees. Pat chicken dry with a paper towel, place on a plate and season with salt, pepper, garlic and a little olive oil.  Place potatoes, peppers and onion on the sheet pan and drizzle with olive oil, salt, pepper and garlic. Toss until everything is evenly coated.  Sprinkle with the fresh thyme.  Place the chicken on the pan and put in pre-heated oven for 15 minutes.  After 15 minutes add the artichokes and olives and place back in oven for 10 more minutes.  Remove from oven and let rest for about 5 minutes before drizzling with glaze and garnishing with basil. Enjoy!


Tuesday, February 6, 2018

Baby Update ~ Hip Dysplasia & Life 6 Months Later...


I recently had someone send me a private message on my business Facebook account that I missed for several weeks because I forget to check it sometimes.  I felt awful, because the message was about hip dysplasia and their baby girl's recent diagnosis.  It got me thinking about the original post I wrote about tips for living with a Pavlik Harness, and also thinking that people may be curious to know how Camille is doing six months (about) later.

A little back story- (FULL STORY HERE) Camille, our third daughter was diagnosed with hip dysplasia at two days old, but it took about six weeks to get our referral to Shriner's Children's Hospital, as Sutter Health Care doesn't have any pediatric orthopedic doctors.  When we were told she would need to wear a Pavlik Harness as part of her treatment, it was a hard pill to swallow.

I shared some tips on making life a little easier when you are going through this treatment process a few months ago (Link here). In July we got the great news that Camille's treatment had been successful, although her hips were still not completely normal.  At some point she may need surgery, but that is years down the road.

Anyway, what I really want to share with you is the progress she's made in the last 6 months. In July, at 6 months old, Camille could barely manage to roll over, and couldn't sit up at all.  Her development since thin is remarkable, she went from barely moving, to sitting up and standing in less than three months.  At 9 months she completely had crawling mastered, and at 11 months she was walking!


We celebrated her first birthday a couple of weeks ago, and we couldn't be more proud of this little lady!  For any of you going through this treatment with your little one, while it feels like it's going to last forever, it doesn't!  Hang in there, your babe will be walking in no time!