Tuesday, November 6, 2018

Living Room Updates

My home is always a work in progress. Sound familiar? My to do list is never done, I’ve always got “one more” project I’m adding, and I have “that room” too. You know what I mean, right? The guest room that ends up being the room you stick everything you’re not sure where to put but can’t toss?

Life, right? So big changes have happened in here since I last did a home decor update on the blog, and I thought I’d take a second to share them with you today! Do you see that gorgeous fireplace mantel? A good friend from our neighborhood was moving recently and didn’t need it in her new house so she gave it to me! Best part? Her husband came and installed it also!! I can’t tell you how excited I am about this mantle. I’m already shopping for stockings and picturing Christmas decor. For now she’s all prettied up for fall.


Next update?? New area rug! I loved the cream one we had before, but with pets and 3 little kids, I just couldn’t seem to keep it clean. Even after vacuuming I’d find bits of goldfish crackers lingering in the deep shag. So, I finally bit the bullet and bought a new rug.

Traditionally I love wool. But, this time I really wanted something super soft and cozy that doesn’t shed and had a flat pile. I looked online at lots of rugs, but I am a visual and sensory person and really wanted to feel my options. I ended up choosing this one from IKEA, which surprised me because I thought I’d go with the Pottery Barn option. But, when I felt this one I knew it would be the perfect rug for Camille to sit on during speech therapy, cozy enough for movie nights with pillows and blankets, and easy to clean.


That’s all for the big updates to this space, but be sure to stop by later in the week for a few updates I made in Camille’s bedroom!

Saturday, September 22, 2018

Two Easy Kitchen Updates

Hey friends!  Today I'm sharing two of my favorite cheap design ideas that make a huge impact on kitchen spaces! 
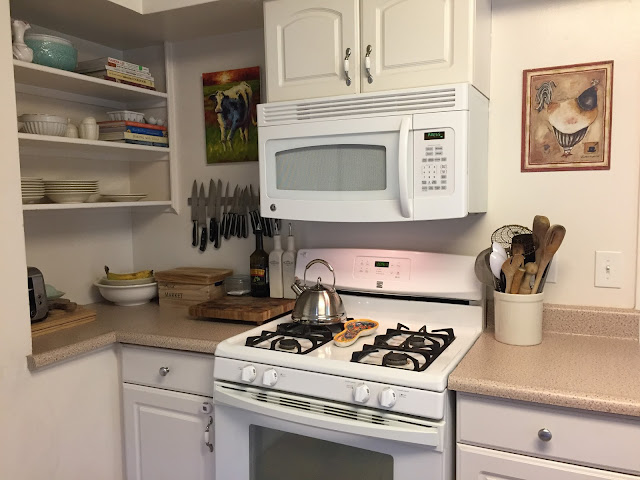
I originally undertook this countertop makeover project in November of 2016.  At the time I was about 7 months pregnant with Camille and I was soooo tired of looking at the ugly blue formica counters we had been living with for years.  I found some cheap granite looking contact paper at Walmart on clearance for about $3 a roll and decided to cover my countertops with it.  The result was clearly soooo much better!  And, it lasted over a year, making that the best $10 I have ever spent!  But, the paper was not very thick, and with the every day use a kitchen gets, it started to peel and get a bit worn through in spots.  So, a few months ago I decided to redo the countertops in fresh contact paper.

kitchen makeover

contact paper

diy kitchen

The paper I chose this time was a little thicker and actually has a bit of texture to it.  I love the neutral color and it actually went on a little easier because the thicker paper didn't stretch as much.  I also found I didn't make as many mistakes this time. Not sure if that's because of the paper or if I just got better with practice.  Below are a few pictures of the first round with contact paper.

diy

And here are the ugly counters with nothing on them...


So much better after, right??

DIY Countertops

Then, several months after the new contact paper went down, I started thinking about a back splash...


kitchen backsplash, tile


subway tile, peel and stick tile

I found these peel and stick tiles on Amazon.  They were $42.97 cents for 10 tiles and they made a huge impact!  They are really easy to put up, but a little tricky around the outlets.  Make sure you have a very sharp utility knife if you give this a go!  Other than that, the directions were great, and this took about an hour to do.  I love the outcome and I feel so much happier spending time in this room now!

kitchentile, subway tile

I hope these small changes inspire you to make a change if you are living in a space you don't love!


Wednesday, September 12, 2018

Meatballs & Creamy Curry Sauce

This is one of my favorite 30 minute meals.  Meatballs are so versatile and are one of my favorite comfort foods.  I cheat in order to make this a 30 minute meal and use the turkey meatballs from Trader Joe's.  They are really tasty, but by all means, if you have the time and patience, make your own! 

meatball curry, red curry, yellow curry


Curry Sauce (serves 6)
3/4 cup onion finely diced
4 garlic cloves, minced
1 tbsp Thai red curry paste (preferably Mae Ploy brand)
2 tbsp Thai yellow curry paste (Preferably Mae Ploy brand)
3 14 oz cans coconut cream (I use the Trader Joe's brand)
3 tbsp lime juice
1 tbsp fish sauce
1 tbsp sugar
1 tsp salt (optional)
1 tbsp corn starch
1/2 cup fresh basil, thinly sliced (optional)
1/2 cup cilantro leaves, (optional)

To make the curry sauce start by adding a couple tables spoons of canola or coconut oil to the pan. Once the oil is hot (med-high heat) add the onions and sauté until soft, about 5 minutes. Add garlic and sauté 2 minutes longer. Add the curry paste and break it up as much as possible. Add the coconut cream (reserve about 1/4 of one can of the cream) and whisk until paste and cream are fully incorporated and sauce is smooth. When sauce is smooth, add the lime juice, fish sauce, sugar and salt if using.   Bring to a boil and add all the meatballs back into the curry sauce. Turn heat to a simmer, cover the pan with a lid. Simmer meatballs for 20 minutes.  If you find (like me) that the sauce is still a little thin at this point, mix the reserved coconut cream and the corn starch until has disolved.  Add to the sauce and stir until the sauce has thickened and the meatballs are cooked through the center.  Serve over jasmine rice or veggies and garnish with additional lime, basil and cilantro.

Thursday, August 9, 2018

Summer Sweets ~ Peach Cobbler

I don't know about you all, but peaches are my absolute favorite fruit.  Now is the time to get them at the farmer's market or from your neighbor's backyard if you are lucky!  I'm not usually one to buy bulk fruit at Costco, but guys, I couldn't resist.  They smelled sooo good and looked beautiful and they made their way into my cart before I could blink.


Unfortunately, my husband stacked up some other goodies on top of them, and by the time we got out to the car three of my peaches had been smushed.  I knew that I'd have to make a cobbler and was excited to get started on it as soon as I got home.

This is no fancy dessert, just simple, delicious and easy to put together.

Ingredients:
4 large fresh peaches, peeled and sliced
1/4-1/2 cup of sugar
1 tsp of cinnamon
2 tbs flour
pinch of salt
2 cups of bisquick
3 tbs melted butter
2 cups bisquick baking mix
2/3 cup of milk

Directions:


  • Preheat oven to 350 degrees. After all your peaches are sliced, taste one and see how sweet they are.  If they are super sweet, use less sugar, if they are tart, use a little more. Mix 1/4 cup (more if needed) of sugar with cinnamon, flour, and salt.  sprinkle over the peaches and toss gently.  
  • Evenly layer the peaches in a greased baking dish.  In a mixing bowl combine the bisquick, melted butter and milk and combine.  Dough should be wet and sticky, not runny. (Add a little more bisquick if it is too lose.)
  • Spoon dough over the top of the peaches until they are nearly all evenly coated with a little dough.  Sprinkle a little sugar 1-2 tsp over the top of the dough and bake in oven until dough is golden, about 20 minutes. Serve with fresh whipped cream or vanilla ice cream.


I hope your family enjoys this cobbler as much as mine did! 


Wednesday, May 9, 2018

Hot Mess Mom Diary - Vol. 3

Oh Friends, it's been a while.  The last month has really kicked my butt as far as this mom business goes.  If you're new around here, I'm Heather.  I have three little girls, ages 9, 6 and 16 months.  They keep me on my toes, to say the least.  Between band, choir, gymnastics and baby proofing, I'm hanging on by a thread.  I can almost see summer break in sight!  Almost...

About a month ago my 9 year old daughter, Lily Claire, started her journey into the straight teeth club.  I'm not going to lie, orthodontia is expensive, but her x-rays showed there was just not enough room in her mouth, so she got molds made and an expander put in.  They said she would get used to it in a day or two, but that didn't happen.  Every night we used a key to turn the metal device in her mouth to expand her palate so her teeth would have more room and fit in her mouth.  The turning wasn't too bad, but Lily Claire never got the hang of talking with it in, and eating was such a challenge.  She began to lose weight, and after a few weeks I shared my concern with her pediatrician.  She agreed that this wasn't good.  Monday we went in because over the weekend the bracket on her back tooth holding it in place broke off.  I talked to the orthodontist about the weight loss and they agreed to take it out and have a retainer made to keep things in place now that the expansion part was complete.  Whew, one thing down.  Soooo many more to go.

Kid #2 is Ella.  Ella's a firecracker she is full of energy and talks non-stop, even in her sleep.  She is in kindergarten this year and she also does gymnastics and track.  About 2 weeks ago Ella tripped over her flip flop after gymnastics was over and fell and broke her elbow.  The doctor in the ER showed me the fracture and sent a referral to the orthopedist.  At the orthopedist appointment she said she didn't think there was a fracture, it was a growth plate, and Ella was fine.  But Ella continued to cry and say her elbow hurt.  Ella loves to be active and doesn't let much slow her down, so I knew something didn't feel right about this diagnosis.  I emailed Ella's pediatrician and she said we should re-x-ray in 10 days to see how things were looking.  So, last Friday her second set of x-rays confirmed the fracture and we went back to the orthopedist.  Now Ella has a bright pink cast from fingertip to arm pit.  Luckily elbows heal quickly and she only has to wear it a few weeks,

Camille is my baby.  She's almost 16 months old and she's into everything.  She also gets sick a lot.  We wash our hands and clean the carts at the grocery store, but come on, kids that age put their mouth on everything.  And with my two older kids and their activities, staying at home in a bubble is not an option.  Camille has had 4 ear infections since the end of March.  She's pretty much been on antibiotics constantly for over 6 weeks.  We have a consult with ENT to have tubes put in later today.

Between the teeth, the broken elbow, and the ears, I'm one tired momma.  June 5th can't come soon enough!

Tuesday, April 17, 2018

Finding Inspiration for Home Decor

Have you ever been stuck in a rut with your home decor?  Maybe you still have a plaid couch, hello 1990?!!  Or  a room that you've been meaning to paint for years, but you keep putting it off.  I know it's hard to believe, but I'm guilty of this too.  And there are may reasons for why this is so common.  Time, budget, lack of inspiration, indecisiveness, fear...

But, some of my very favorite home projects were very affordable (hello, one income family of five!) and pretty easy to accomplish myself.  So, here is my suggestion of the day, because, you know, obviously a self proclaimed expert here (insert eye-roll).  Find your inspiration!
kitchen decor, backsplash, DIY

It seems simple, but with so much decor and so many different styles out there, it can be super overwhelming.  So, here's my suggestion.  Pinterest, magazines, bloggers, tv shows... What are you drawn to?  What makes you feel good?  Comfortable, happy?  Is it costal decor, farmhouse style, rustic, modern...  What are you most drawn towards.  Don't think about what's popular or what other people are doing.  What do YOU like?  Start a Pinterest board, or cut out pictures you love and keep them in a folder.  Do this for a few days, weeks, months, then look at what you were drawn to the most.  There's your starting point!

Now, what next?  Pick a room.  And preferably not a huge room, like your kitchen or main living space.  A bedroom, office or bathroom are a great place to start.  People tell me all the time, "I just don't know where to start." or "You are so good at decor, I wish you would do my house."  My biggest suggestion is start small and work towards bigger spaces as you gain confidence.

If you start with a bedroom, look at what you're drawn to in the pictures you've collected.  Is the paint light or dark?  Paint is a perfect start!  Get samples, most hardware stores sell them for $3-5 so grab a few and pain the wall in a few spots and see what you like most.  What bedding do you love?  A duvet, a quilt, solid colors, patterns? 

Now, here's my favorite part.  The shopping!  I know spending money can be intimidating.  My best advice here is set a budget and consider one splurge item.  For example, paint is reasonable, accessories can be collected over time and don't have to cost an arm and a leg, but bedding might be the one place where you want to spend the majority of your budget.

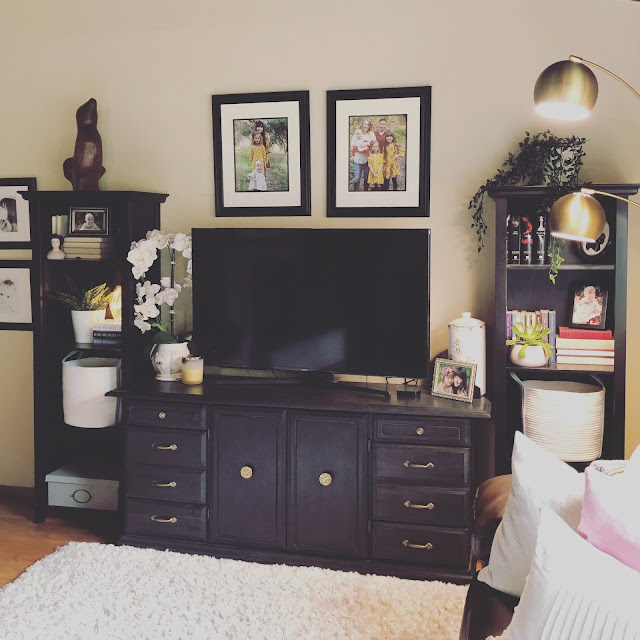
This advice can be applied in pretty much any room makeover.  For example, your living space.  Consider what you want out of this room.  Is a comfy couch your priority, do you love a big TV?  Pick your splurge item and then build around it.  For me, the couch was our splurge.  At about $900 is was the most expensive item in the living room.  That meant I had to make compromises on the other furniture items.  For example, the media cabinet was a $25 GoodWill find that I painted with black chalk paint.  The rug came from Costco.  The chair was a Craigslist find.  The books and accessories were collected over time and mostly came from thrift stores, TJ Maxx, Homegoods... And I didn't buy everything at once.  It takes time to find what you love.  Also, shop your home.  You'd be amazed how moving a picture or plant from one room to another can change the feel of a space.
thrifty finds, home decor

living room, decor, rustic farmhouse

My two cents for the day...

Monday, April 16, 2018

Favorite Weeknight Meals

Here we are, half way through April, with less than two months of the school year to go. Of course, it feels like the year has flown by, and at the same time, I'm like the kid in the back seat on a road trip going "is it over yet??" Anyone else with me??

Of course our busy schedule doesn't help... Lily Claire- choir & band Mondy, Choir Tuesday, Band Wednesday, Orthodontist Thursdays... Ella, gymnastics Monday and Track Tuesdays. Plus, we've had non-stop colds and Camille is on her THIRD ear infection in a month! I'm currently waiting on the ENT to call with a consult for tubes.

So, I don't know about you, but I could use all the help I can get with planning quick, healthy meals for the family. If you follow me on Instagram @lilyseclaires, I frequently feature recipes on my stories. But, I thought, for convenience sake, I'd just post a few favorites in one place to give you inspiration. I hope these make meal planning a little easier for you this week!

French Dip Sliders


Ingredients:

1 pkg of hawaiian sweet dinner rolls
thinly sliced deli roast beef
6 slices of provolone cheese
1 sweet onion thinly sliced
6 tbs of butter divided
1 tbs ppoppy seeds
1 1/2 tsp worcestershire sauce
1 tsp onion powder

1/2 tsp seasoning salt

Instructions:
Sautee thinly sliced onion in 2 tbs of butter over medium heat until caramelized. This takes about 10 minutes, but while they are cooking you can start prepping the bread and other ingredients.

Remove the rolls from the package and slice completely in half with a serrated knife while still stuck together. You should have one half with bottoms and one half with tops. Place bottom half of rolls in a buttered or sprayed baking dish. Add a layer of thinly sliced roast beef and a layer of cheese. When the onions are done spread them over the layer of cheese and top with another layer of roast beef. Place the top half of rolls. In an oven safe bowl melt 4tbs of butter for 30 seconds, then add worcestershire sauce and seasonings and stir well. Pour butter sauce over the top of the rolls and then cover with aluminum foil. Bake in 350 degree oven for 20 minutes covered, then remove the foil and bake for 5 minutes uncovered.

Sesame Chicken


1 large egg
2 Tbsp cornstarch
1 lb. boneless, skinless chicken leg/thigh portions
2 Tbsp vegetable oil (for frying)
Ingredients for the Sauce
2 Tbsp soy sauce
1 Tbsp water
½ Tbsp toasted sesame oil
1½ Tbsp brown sugar
1½ Tbsp rice vinegar
1 inch fresh ginger, grated
1 clove garlic, minced
2 Tbsp sesame seeds
1 Tbsp cornstarch

Instructions for the Chicken:
In a large bowl, whisk together the egg and 2 tbsp cornstarch.. Trim any excess fat from the chicken leg/thighs, then cut them into small 1 inch pieces. Toss the chicken in the egg and cornstarch mixture.
Heat a large skillet with 2 Tbsp of vegetable oil over very high heat. When the oil is very hot (it should look wavy on the surface), add the chicken and all of the egg mixture. Cook the chicken, stirring only occasionally, until it is golden brown and cooked through (about 7-10 minutes). Drain off the excess oil, if desired. (If you double this recipe you may want to brown the chicken in batches so it all gets golden brown instead of just steaming.)
Instructions for the Sauce:
While the chicken is cooking, prepare the sauce. In a small bowl stir together the soy sauce, water, sesame oil, brown sugar, rice vinegar, fresh ginger, minced garlic, cornstarch, and sesame seeds.
Once the chicken is cooked through and golden brown, pour the sauce over top. Toss the chicken to coat in the sauce. The sauce will begin to thicken as soon as it hits the hot skillet. Once the chicken is coated and the sauce thickened, turn off the heat.
Serve the chicken over a bed of rice and sprinkle the sliced green onions over top.


Broccolini & Sausage Penne

pasta

Ingredients:
1 bunch of broccolini
1 lb. penne or pasta of choice
olive oil
garlic sliced thinly (use as much as you like, I use a lot!)
red pepper flake
reserved pasta cooking water
1 pkg of cooked turkey sausage with artichoke & spinach (or any protein you like!)

Directions:
Cook the pasta just shy of al dente and reserve a mug full of the cooking water.  While pasta is cooking, in a heavy bottomed skillet, I always use cast iron, heat olive oil on medium heat and add garlic and pepper flake. Make sure it doesn't burn, just toasts lightly and turns golden.  When the pasta is done, drain, but don't toss out the water, and add to the garlic. Add the broccolini to the boiling water and cook 2-3 minutes, then drain and add to the skillet with pasta and garlic.  If needed add a little of your reserved cooking water to make a lose sauce. Taste for seasoning and add salt and more pepper if desired. Remove from heat and serve with parmesan or cheese of choice.

Enjoy!

mediterranean food, artichokes, olives

Mediterranean Sheet Pan Dinner


Ingredients:
4 regular sized chicken breast portions or 8-10 breast tenders
1 can of artichoke hearts drained and patted as dry as you can get them
1 can of pitted green olives
1 small can of black or kalamata olives pitted
1 red bell pepper seeded and cut into large strips
2 red potatoes sliced 1/2" thick
1/2 a red onion cut into thick slices
olive oil
fresh thyme
salt & pepper
granulated garlic
balsamic glaze (bought at Trader Joe's) (you don't need this but it makes it pretty and give it extra flavor)
fresh basil for garnish

Directions:
Spray a large sheet pan with non-stick spray and pre-heat your oven to 425 degrees. Pat chicken dry with a paper towel, place on a plate and season with salt, pepper, garlic and a little olive oil.  Place potatoes, peppers and onion on the sheet pan and drizzle with olive oil, salt, pepper and garlic. Toss until everything is evenly coated.  Sprinkle with the fresh thyme.  Place the chicken on the pan and put in pre-heated oven for 15 minutes.  After 15 minutes add the artichokes and olives and place back in oven for 10 more minutes.  Remove from oven and let rest for about 5 minutes before drizzling with glaze and garnishing with basil. Enjoy!


Thursday, April 5, 2018

Social Media & What I Share

I've received several messages lately and I want to take a minute to address the questions and comments I keep getting here on my blog.  First off, this is MY blog.  I get quite a few comments or questions about it sticking to one type of Blog/Instagram Account/Facebook account.  While I realize that my blog name is Lily's E'Claires, I want to be clear that my blog is not all about making pastries.  Lily Claire is my oldest daughter.  I love to cook and I wanted to share recipes with people who may enjoy them.  I also love home decor and my family.  I don't want to have separate accounts for all of these things, because I would drive myself crazy switching back and forth from site to site and I feel it's a waste of my time and just not what I'm all about.

I have had comments made about my page that I should "stick to food" or "Why do you share so many pictures of people?" or "you'd be more successful if you stick to one color palate."  Let's be clear here.  Yes, I do make a small amount of money off my blog, but I have no intention of changing it in any way to make other people happy.

I want to share recipes.  I want to share my home.  I want to share my family.  Sometimes I want to share my garden or an honest review of a product, or a story that made me laugh.  If you are somehow offended that I don't share enough of one thing, please don't worry about following me.  It won't hurt my feelings if you don't want to be friends on Instagram.

And no, I won't be switching to sharing only interior design, or open a separate account to share pics of my kids.  This is MY life, my creative outlet and I will choose what I wish to share.  And if you like what I share, thanks!  I appreciate the love! 💙

family, food, home

family, food, home

Family, food, home


Wednesday, April 4, 2018

Hot Mess Mom Diary - Vol. 2

Sleep

Let's take a moment to talk about sleep, shall we??  Do you sleep?  I don't.  I mean, I do, but I don't.  You see, I have kids.  If you're a mom, you know what I mean.  (Maybe some dads know too, maybe...) But let's be honest here, after the newborn phase is over, my husband doesn't get up.  I pretty much have to shove him out of the bed to wake him up and by that time, baby is in a full tantrum and it's pretty much pointless to ask him to help because, she wants momma, not daddy, anyway. 

My baby is 14 months now.  She just transitioned from formula a few weeks ago.  From about 6 months to probably 10 months she slept through the night like an angel.  I joked that she was my favorite because she was my best sleeper.  There may be some truth to that... But, then around 11 months something changed.  What?  I can only guess.  She got a pretty bad virus and it turned out to be RSV.  She also started getting teeth, one after the other.  She hit a growth spurt.  All the things.  All at once.  And she started waking up.  Once, twice, sometimes three times.  I tried co-sleeping, but she just tossed and turned and she barely slept, I barely slept.  We tried letting her cry it out, but my momma heart just couldn't take it.  I'm a wimp like that.  I felt like we tried everything.

From day one with her, I kept hearing about the Dock a Tot.  I really thought about buying one in the beginning, but Camille had hip dysplasia and I didn't think she would be able to sleep in the abducted position with her harness on comfortably due to the narrowness of the bed.  That's what makes baby feel so cozy, but it just wouldn't work on my baby.  But, now that she has graduated out of wearing the harness and her hips are developing properly, I started rethinking my position on the Dock a Tot.

At nearly $300 I really hesitated.  It's a lot of money.  But, on Buy, Sell, Trade sites they are a hot comodity so I thought I'd just resell it if it didn't work for us.  I actually didn't have much of a hope that it would, as she was so set in her ways, and I thought waking up several times was probably just a habit more than anything at this point.

Friends, I'm happy to report I was wrong.  Dead WRONG.  It worked.  She slept.  I slept.  I slept!!!!  Now, let's be realistic, I still wake up to check the monitor, use the bathroom, let the cat out.  I wake up because I hear 87 noises that might be her.  I wake up hot or cold.  Seriously, after being a parent for almost 10 years now, I probably will always wake up.  But, most nights, it's nothing, and I go back to sleep.  Thank the gods!! 

I was not paid by Dock a Tot to write this review.  I paid out of my own pocket for this item.  It was not cheap.  It may not work for your baby,  But, I'm so happy to say it seems to be working for mine! And, as a mom, anything that might help another mom get some sleep is something worth sharing with you!

So, Dock That Tot!

xoxo

Saturday, March 24, 2018

Spring Living

I've been working on a spring home tour for a while, but of course, keeping all the rooms clean enough to photograph all at once is impossible with kids.

rustic farm house

Instead of sharing the whole house, I'm sharing a couple of pictures of the main room in our house.  We don't have a separate family room or den in our house.  Just this one main room.  It's our dining room and where we all hang out as a family and watch tv together.  I love this room, but constantly struggle with keeping the space light and bright.  The dark ceilings can be hard to work with.  And, although I love our performance leather sofa for the convenience of being able to literally wipe it off with a clorox wipe, it is a large dark piece of furniture.  Throw pillows and a soft plush ivory rug are really important to lighten things up in here.

entry way

These shoe bins from IKEA were one of the best organizational pieces we've ever incorporated into our home.  The kids each have two drawers, which makes getting ready for school in the morning so much easier when no one has to scramble to search for a missing shoe.  I'm also loving this new runner we found at Target for the entry way.  We have a smaller matching rug in front of the back door as well.

storage, organization

A gallery wall with family photos and art lines the entry wall and welcomes people into our cozy home.

ironstone, hutch, farm house

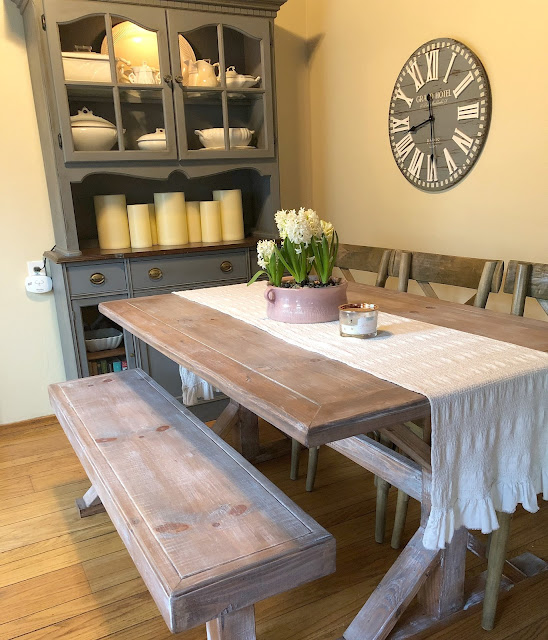
We are still loving this new dining table we had made for the space.  I know that a rug under it would be a good choice, design wise, but we have three kids and between spills and crumbs, I just can't bring myself to put down a rug. 

fiddle leaf fig

Moving the credenza, pictured above, to the wall behind the dining table and placing the old hutch cabinet on top was one of my favorite changes I've made to this space recently.  It opened up this side of the room and allows a lot more light in through this window.  Some low stools and a plant add some extra seating when we have company and the plant brings life to the room.  I am a really big fan of adding plants, even faux, or fresh flowers to a space.  I feel like they bring life to a room, plus they make me happy.

I hope these pictures inspire you to incorporate some fresh spring touches around your home this weekend!

xoxo