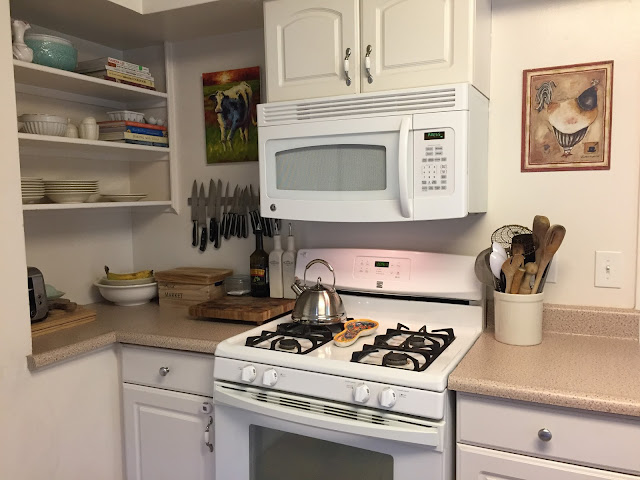
So, here are some before shots. I know they aren't the best quality, but you can definitely see the ugly blue formica that we have lived with for over 5 years now. I hated it. Really hated it.


SO. MUCH. BETTER!!!
How did I accomplish this look for $10? Contact paper and patience.
I saw the idea on Pinterest, but in the examples I found, everyone used rolls of peel and stick vinyl that looked like marble. Although most of the reviews I read on Amazon were positive, I was a little hesitant to go through with the order because I wasn't sure that the white marble was the right look for my kitchen. I was also nervous that the blue might show through, and then what would be the point? Oh, and it was a little expensive... Although not really, just about $10-15 a roll, but I would probably need 4-5 rolls and investing $50-60 in something I wasn't sure of made me a little uneasy.
So... I went on the hunt for something I could find locally. Home Depot was very limited in their supply and I found one speckled option similar to the one I used, but it had a lot of white in it, which I didn't love. Target had nothing, Emigh Hardware didn't have anything I liked, so I tried Walmart (I hate Walmart) as a last resort. And I found it! On Clearance for $4.90 a roll. So I bought three rolls.
I only ended up needing two rolls, and I did scrap a few sections because I got frustrated and had the paper stick to itself, or crease and I wasn't able to smooth it well enough. But, I'm really glad I have the extra roll now because I can always touch a section up or even replace it if I need to.
Here is what you need for this project:
- Contact paper (use a measuring tape to take a basic measurement ahead of time so you know how much to buy, and make sure to buy a little extra)
- Very clean kitchen countertops
- Room to move around
- utility knife, scissors & credit card
- good music
- coffee
- Start in a corner or section of countertop that isn't the main focus in your kitchen. I started mine in this corner (pictured below) because it is a little darker here and harder to see imperfections, and also because I keep a lot of everyday supplies here so I knew I could hide any mistakes with a strategically placed cutting board or bowl of fruit.
- Work in small sections when possible. If you cut too big of a piece and try to cover a large area all at once, it is much more difficult to smooth out bubbles and prevent creases. Using small sections to cover the back splash area and to go around sinks or edges/corners made for a much easier application and smoother look.
- Have a sharp utility knife on hand and a credit card. I put a brand new blade in my knife before I started this project, which made cuts really easy to make. The credit card is good for smoothing air bubbles.
- Have a ton of patience. This can be tedious and frustrating at times. The contact paper that I used was not very thick and therefore stretched a little if you needed to lift and re-position.
- Don't start this project without having several hours to devote to it, or plan to do it in steps. I have a very small amount of counter space and it still took 3-4 hours to apply.
- Don't expect perfection. You will miss some air bubbles and some seams may not be perfectly straight. Try no to let this stress you out. Remember the end result is just to cover whatever god awful formica or material you have underneath them. It may not be perfect, but it will be so much better than before.
 |
| You can see the corner that I started in above! |
The end result for me was worth the effort. I don't know how long it will last or how it will hold up, but I will be happy to update you as time passes! I hope I inspired you to be brave and tackle a project like this in your own house!


No comments:
Post a Comment
Thank you for your lovely comments!